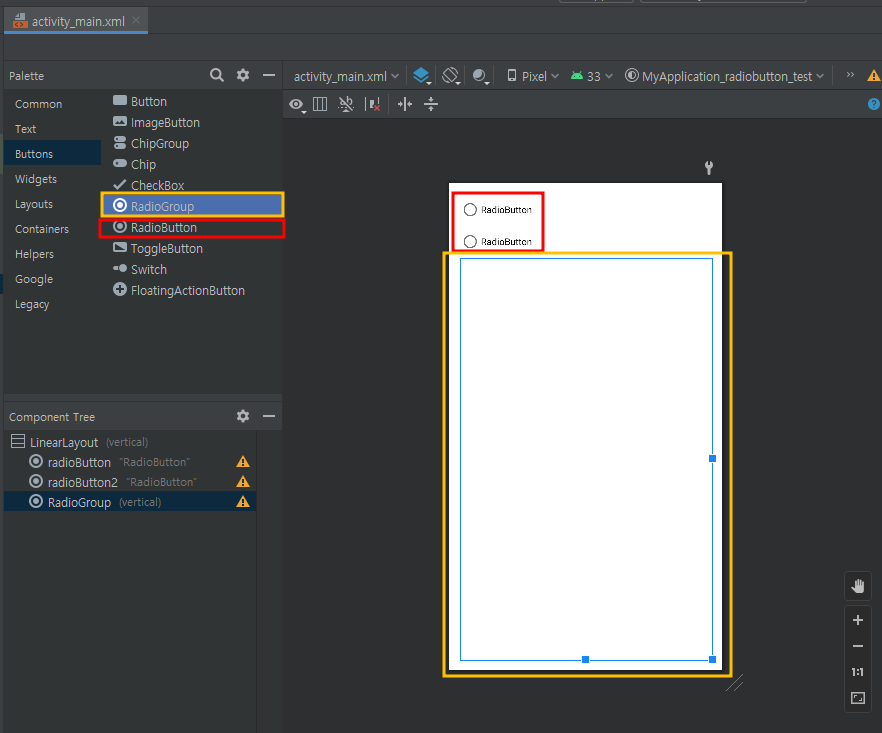
activity_main.xml 파일의 Design탭에서 RadioGroup 내 RadioButton을 넣기 힘들기 때문에
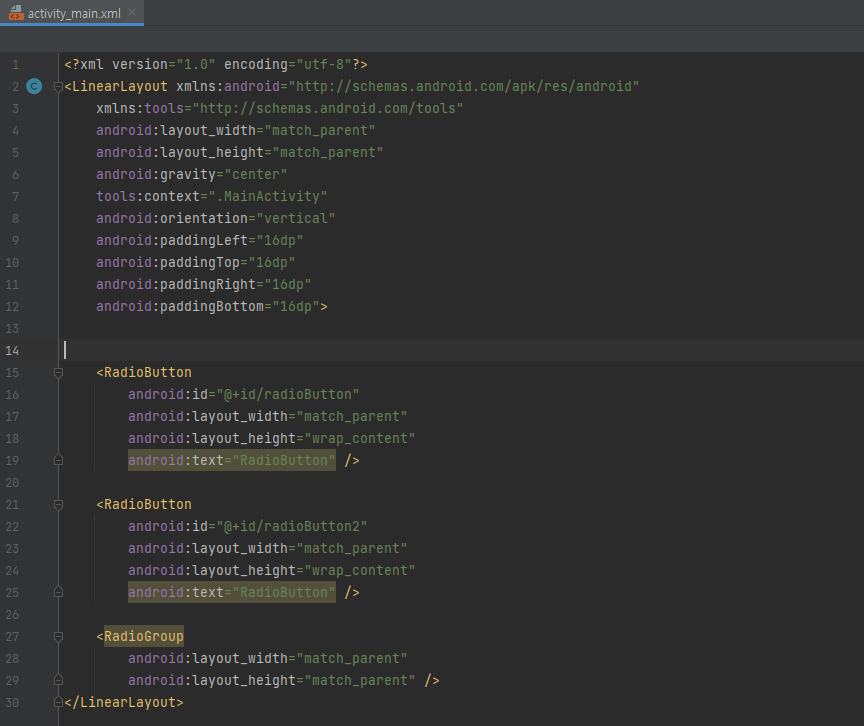
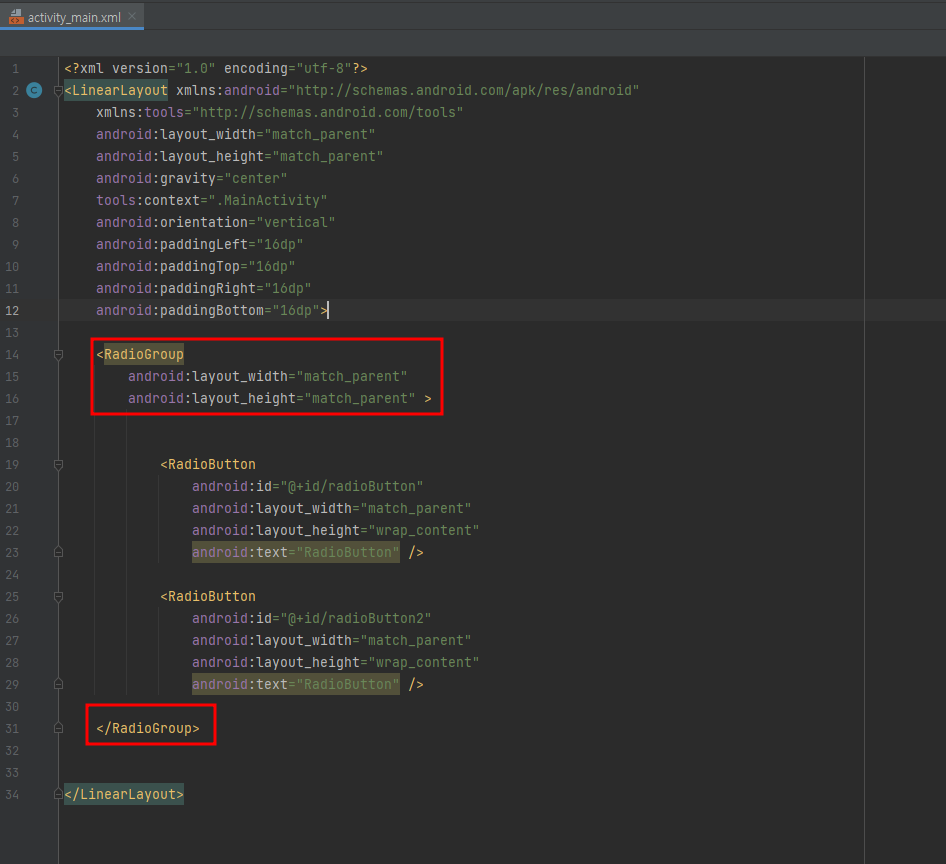
activity_main.xml 파일의 Source탭에서 RadioGroup 태그로 감싸준다.

MainActivity.java
package com.example.myapplication_radiobutton_test;

import androidx.appcompat.app.AppCompatActivity;

import android.os.Bundle;
import android.provider.MediaStore;
import android.view.View;
import android.widget.RadioButton;
import android.widget.RadioGroup;
import android.widget.TextView;

public class MainActivity extends AppCompatActivity {

    @Override
    protected void onCreate(Bundle savedInstanceState) {
        super.onCreate(savedInstanceState);
        setContentView(R.layout.activity_main);

        //라디오 그룹 설정
        r_group = (RadioGroup) findViewById(R.id.radioGroup);

        //텍스트뷰 설정
        tv = (TextView) findViewById(R.id.textView);

        //라디오 그룹 이벤트
        r_group.setOnCheckedChangeListener(new RadioGroup.OnCheckedChangeListener() {
            @Override
            public void onCheckedChanged(RadioGroup radioGroup, int radioButtonGubn) {

                //라디오 버튼 설정
                r_btn = (RadioButton) findViewById(radioButtonGubn);

                //텍스트뷰 안에 라디오 버튼의 text를 가져온다!
                tv.setText(r_btn.getText());
            }
        });

    }

    //라디오그룹 객체의 변수 생성
    RadioGroup r_group;

    //라디오버튼 객체의 변수 생성
    RadioButton r_btn, r_btn2;

    //텍스트뷰 객체의 변수 생성
    TextView tv;


}
activity_main.xml
<?xml version="1.0" encoding="utf-8"?>
<LinearLayout xmlns:android="http://schemas.android.com/apk/res/android"
xmlns:tools="http://schemas.android.com/tools"
android:layout_width="match_parent"
android:layout_height="match_parent"
android:gravity="center"
tools:context=".MainActivity"
android:orientation="vertical"
android:paddingLeft="16dp"
android:paddingTop="16dp"
android:paddingRight="16dp"
android:paddingBottom="16dp">
<RadioGroup
android:id="@+id/radioGroup"
android:layout_width="match_parent"
android:layout_height="475dp">
<RadioButton
android:id="@+id/radioButton"
android:layout_width="match_parent"
android:layout_height="wrap_content"
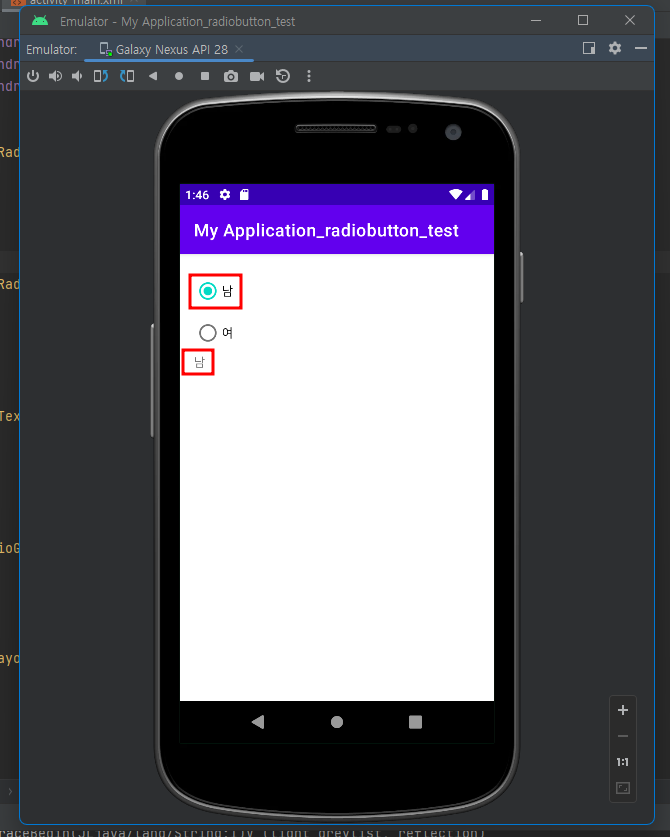
android:text="남" />
<RadioButton
android:id="@+id/radioButton2"
android:layout_width="match_parent"
android:layout_height="wrap_content"
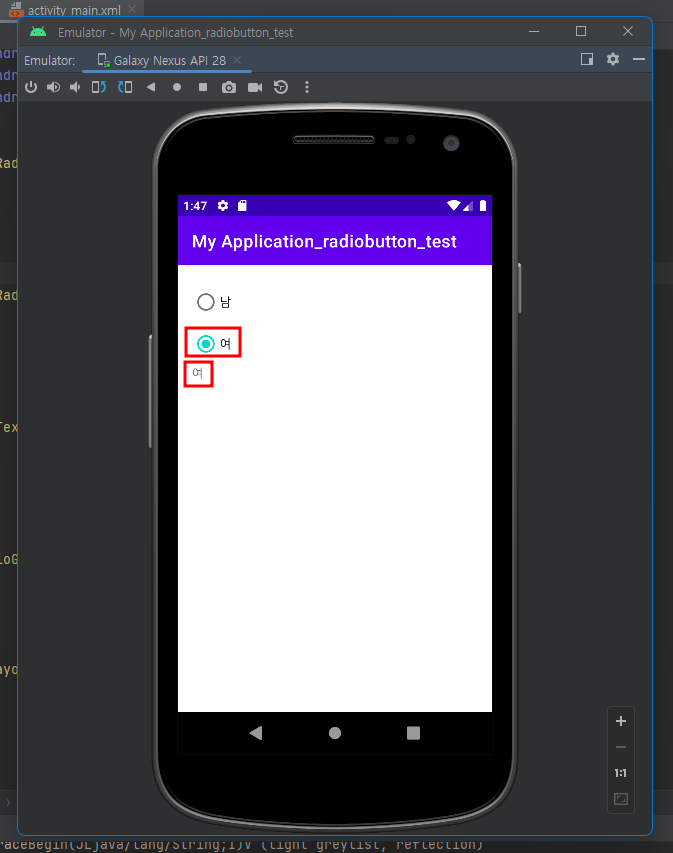
android:text="여" />
<TextView
android:id="@+id/textView"
android:layout_width="match_parent"
android:layout_height="wrap_content"
android:text="TextView" />
</RadioGroup>
</LinearLayout>
<순서>
1. activity_main.xml 파일의 Design탭에서 RadioGroup, RadioButton, TextView를 추가해준다.
2. activity_main.xml 파일의 Source탭에서 RadioGroup으로 RadioButton과 TextView를 감싸준다.
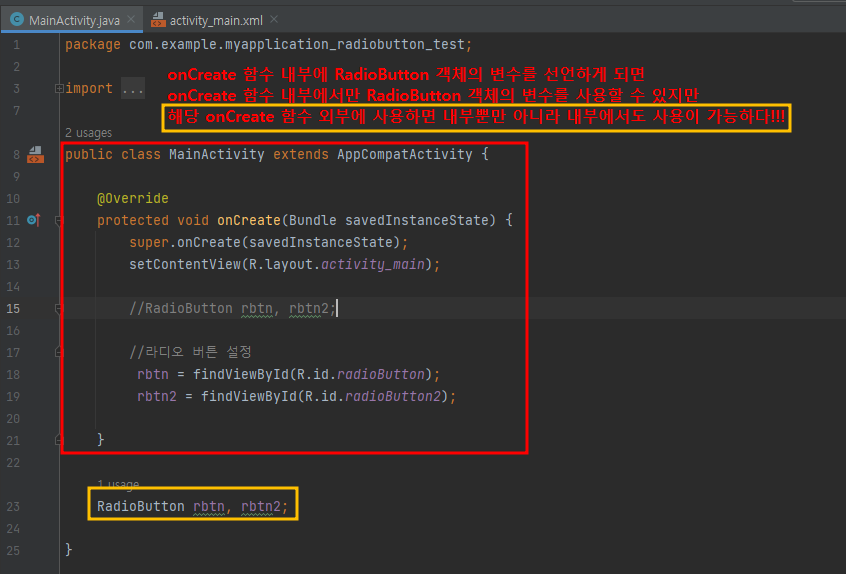
3. MainActivity.java 파일에서 onCreate 함수 내부나 onCreate 함수 외부에 각 객체의 변수를 설정해준다.
---> 내부에 선언해주게 되면 onCreate 함수 내부에서만 사용이 가능하고
외부에서 선언해주면 내부뿐만 아니라 외부에서도 사용이 가능하다.
4. MainActivity.java 파일에서 RadioGroup의 클릭 이벤트를 만들고
이벤트 내 정수형 타입 변수는 초기에는 i라고 되어 있었는데
알아보기 편하게 하기 위해서 radioButtonGroup으로 임의로 변경해줬다.
* 주의할점 : 위의 코드를 보면 RadioButton의 변수를 r_btn, r_btn2 총 2개를 선언해주었다.
RadioGroup 내 RadioButton은 RadioGroup의 이벤트로 제어를 할 수 있고
그 제어는 클릭 이벤트의 정수형 타입인 radioButtonGubn으로 구분이 가능하므로
RadioGroup 클릭 이벤트 내 RadioButton 변수를 하나만 사용하여
findViewById 메소드의 매개변수에 radioButtonGubn을 넣으면
RadioButton을 둘 다 제어가 가능하다.
5. MainActivity.java 파일에서 RadioGroup 이벤트 내에서
TextView에 setText 함수를 활용하여 매개변수에 RadioButton 이름을 getText 해주면 끝이난다.
<최종소스>
MainActivity.java
package com.example.myapplication_radiobutton_test;

import androidx.appcompat.app.AppCompatActivity;

import android.os.Bundle;
import android.provider.MediaStore;
import android.view.View;
import android.widget.RadioButton;
import android.widget.RadioGroup;
import android.widget.TextView;

public class MainActivity extends AppCompatActivity {

    @Override
    protected void onCreate(Bundle savedInstanceState) {
        super.onCreate(savedInstanceState);
        setContentView(R.layout.activity_main);

        //라디오 그룹 설정
        r_group = (RadioGroup) findViewById(R.id.radioGroup);

        //텍스트뷰 설정
        tv = (TextView) findViewById(R.id.textView);

        //라디오 그룹 이벤트
        r_group.setOnCheckedChangeListener(new RadioGroup.OnCheckedChangeListener() {
            @Override
            public void onCheckedChanged(RadioGroup radioGroup, int radioButtonGubn) {

                //라디오 버튼 설정
                radioButton = (RadioButton) findViewById(radioButtonGubn);

                //텍스트뷰 안에 라디오 버튼의 text를 가져온다!
                tv.setText(radioButton.getText());
            }
        });

    }

    //라디오그룹 객체의 변수 생성
    RadioGroup r_group;

    //라디오버튼 객체의 변수 생성
    RadioButton radioButton;

    //텍스트뷰 객체의 변수 생성
    TextView tv;


}
activity_main.xml
<?xml version="1.0" encoding="utf-8"?>
<LinearLayout xmlns:android="http://schemas.android.com/apk/res/android"
    xmlns:tools="http://schemas.android.com/tools"
    android:layout_width="match_parent"
    android:layout_height="match_parent"
    android:gravity="center"
    tools:context=".MainActivity"
    android:orientation="vertical"
    android:paddingLeft="16dp"
    android:paddingTop="16dp"
    android:paddingRight="16dp"
    android:paddingBottom="16dp">

    <RadioGroup
        android:id="@+id/radioGroup"
        android:layout_width="match_parent"
        android:layout_height="475dp">


        <RadioButton
            android:id="@+id/radioButton"
            android:layout_width="match_parent"
            android:layout_height="wrap_content"
            android:text="남" />

        <RadioButton
            android:id="@+id/radioButton2"
            android:layout_width="match_parent"
            android:layout_height="wrap_content"
            android:text="여" />

        <TextView
            android:id="@+id/textView"
            android:layout_width="match_parent"
            android:layout_height="wrap_content"
            android:text="TextView" />

    </RadioGroup>


</LinearLayout>'안드로이드' 카테고리의 다른 글
| 14. 이미지로드와 Swipe 기능 (0) | 2023.03.08 |
|---|---|
| 00. LinearLayout 컴포넌트 정중앙 정렬 (0) | 2023.03.07 |
| 12. 체크박스 만들기 (0) | 2023.03.04 |
| 11. 버튼, 텍스트 뷰를 통한 Listener 개념 (0) | 2023.03.04 |
| 10. 버튼 색깔 바꾸기 (0) | 2023.03.04 |


